When organizing an apartment-sized or undercounter refrigerator, compact shelves quickly turn into a jumble of half-empty jars, forgotten leftovers, and bruised produce. Adding storage containers creates order, but wedging bins edge-to-edge can choke interior ventilation and cause erratic temperature swings. An effective rental refrigerator setup relies on freestanding bins sized to preserve cold air circulation while keeping food safe, visible, and easy to retrieve. Selecting non-permanent bins with smooth vertical profiles allows you to maximize shelf space, prevent cross-contamination from raw proteins, and avoid surface damage that could jeopardize your apartment move-out.
Measure clearances and protect cold circulation
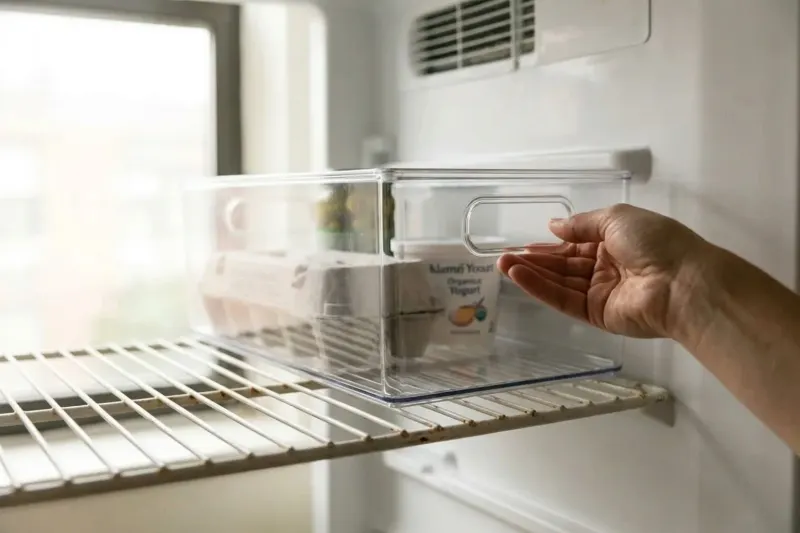
Before purchasing organizers, take precise measurements of your shelf width, usable depth, and the vertical clearance between racks. Compact refrigerators rely on convective air circulation or modest back-wall blowers to distribute cold air throughout the compartment. Packing containers tightly together or pushing them flush against the back cooling wall impedes this circulation, creating warm pockets near the front door and accidentally freezing delicate greens pressed against the rear cooling plate. Leave a buffer of 0.5 to 1.0 inch (1.3 to 2.5 cm) between the back of each bin and the interior wall so cold air descends smoothly across every shelf tier. Major residential appliance manufacturers explicitly advise against covering wire or glass shelves with aluminum foil, paper towels, or solid plastic liners because these barriers stifle vertical airflow. Dial controls marked with numbers 1 through 7 manage cooling output rather than establishing a specific degree reading. Mount an inexpensive freestanding appliance thermometer on the middle shelf to confirm that internal temperatures stay at or below 40°F (4°C), in line with FDA food safety standards.
Related guide: Organize a Small Linen Closet Without Drilling
Assign shelves by safe food zones
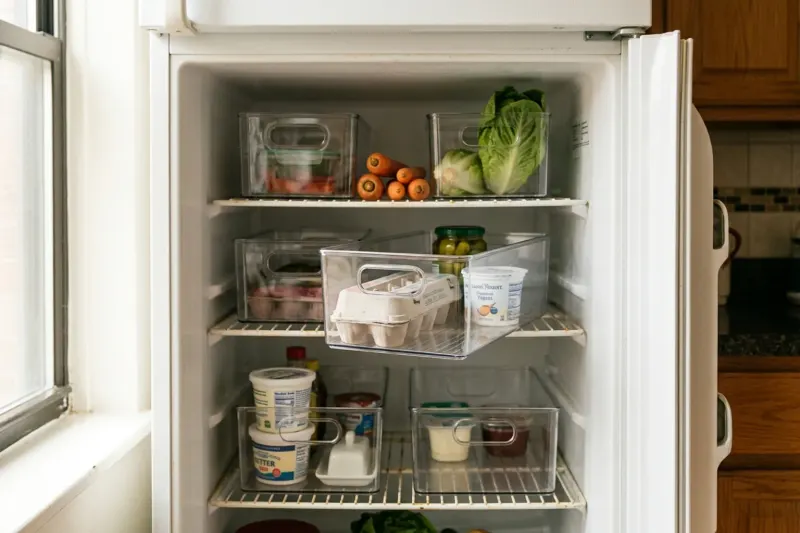
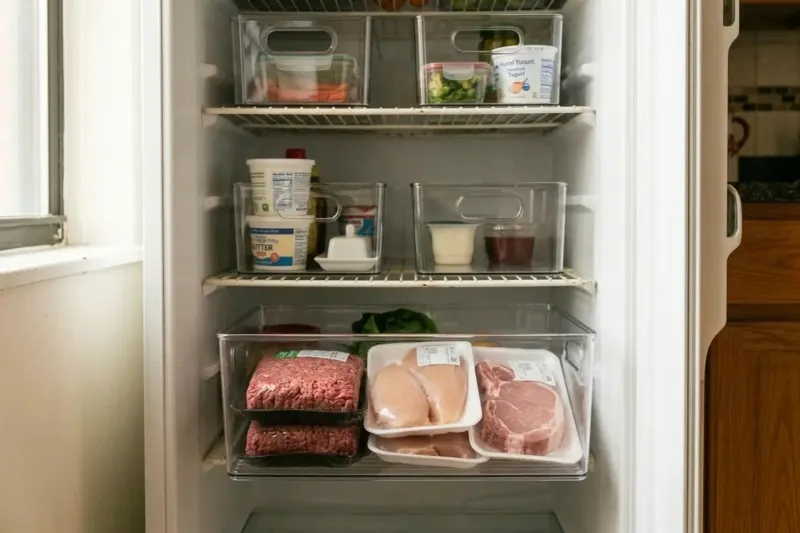
Internal temperatures vary throughout compact refrigerators, making strategic placement essential for food preservation. The interior shelves offer the most consistent temperatures, whereas door shelves endure continuous heat spikes every time the appliance opens. Reserve the upper shelf for ready-to-eat foods, prepped meals in sealed containers, and pasteurized beverages. Use the middle tier for dairy items, eggs, and deli meats, using clear handled caddies that slide forward smoothly like drawers to keep smaller packages from getting lost in the back. Place raw poultry, meat, and seafood exclusively on the lowest shelf inside a dedicated bin with high, leak-proof perimeter walls. The USDA highlights bottom-shelf isolation for raw meats to ensure that condensation or leaking juices cannot drip onto produce or ready-to-eat foods below. Dedicate door compartments strictly to shelf-stable condiments, vinegar-based dressings, butter, and canned seltzers. Keep fresh fluid milk and raw proteins off door racks entirely, where ambient kitchen air rushes in during regular use.
Related guide: Set Up a Dual Work and Dining Nook in a Small Rental
Select freestanding bins for rental shelves
Rental kitchens require organizers that install and remove without tools, adhesives, or permanent modifications. Avoid bins fitted with adhesive mounting strips, suction cups, or rigid clip-on bracket mechanisms that grip shelf trim, as these can chip tempered glass edging, scratch wire coatings, or crack aging interior polystyrene liners upon removal. Freestanding organizers constructed from clear acrylic or polyethylene terephthalate (PET) rest directly on the shelves and lift out effortlessly on moving day. Look for bins with straight vertical walls rather than heavily tapered silhouettes, which waste valuable interior volume along narrow shelves. Molded front handles allow you to slide long rows forward safely without upsetting adjacent jars. When organizing fresh produce, select bins with elevated slotted trays or removable bottom inserts that keep excess moisture from settling around leafy greens and herbs.
Related guide: Organizing Under-Bed Storage with Low-Profile Bins
Wash and reset safely during maintenance
Plan cleaning and reorganization routines carefully so perishable foods spend minimal time outside refrigeration. The USDA advises that refrigerated groceries should never sit at room temperature for more than two hours, or one hour if your kitchen exceeds 90°F (32°C). Shift sensitive dairy products, eggs, and raw meats into an insulated cooler with ice packs while you wipe down interior surfaces. Guard against material damage during cleaning by letting cold glass shelves adjust toward room temperature before washing, as hot water applied to chilled tempered glass can trigger thermal shock and cause sudden shattering. Wash bins and shelves using lukewarm water mixed with mild liquid dish soap or a solution of 1 tablespoon (15 mL) of baking soda per 1 quart (1 L) of clean water. Avoid stiff scrubbing brushes or scouring pads that can scratch and dull clear plastic. Unless an organizer is explicitly labeled as dishwasher-safe, wash all PET containers by hand, as heated appliance wash and dry cycles warp thin plastics and break structural seals.
Choosing Bin Dimensions and Styles
| Situation | Consider | Why |
|---|---|---|
| Bottles and condiment jars get hidden in deep rear corners | Narrow pull-out tray (4 to 5 inches / 10 to 13 cm wide) with a molded front handle | Enables sliding the full row forward like a shallow drawer without tipping adjacent containers. |
| Storing raw poultry or meat packages safely on wire racks | Solid-base leak-proof containment tray with high vertical walls | Contains packaging condensation and raw meat juices, preventing drips from reaching lower shelves. |
| Storing washed salad greens and delicate herbs | Ventilated produce container with a raised bottom insert | Lifts produce above pooled condensation while encouraging horizontal air circulation to slow spoilage. |
| Organizing small snack packs, cheeses, and yogurt cups on upper shelves | Stackable modular bins with front access cutouts | Utilizes vertical clearance between shelves while allowing items to be retrieved without unstacking the bins. |
Hypothetical Shelf Allocation on a 20-inch Compact Shelf
Consider a hypothetical compact rental refrigerator shelf measuring 20 inches (50.8 cm) wide by 14 inches (35.6 cm) usable depth. Placing two 6-inch-wide (15.2 cm) bins alongside one 5-inch-wide (12.7 cm) bin totals 17 inches (43.1 cm) in combined width, leaving a comfortable 3-inch (7.7 cm) total buffer along the sides for natural airflow and easy hand clearance. Selecting bins with a 12.5-inch (31.8 cm) front-to-back length preserves a 1.5-inch (3.8 cm) ventilation buffer against the back wall.
- Left bin (deli and dairy)
- Center bin (jars and snacks)
- Right bin (produce)
When this approach is not a good fit
This modular freestanding bin strategy is unsuitable for micro-cube mini refrigerators (under 1.7 cubic feet) featuring an unshielded interior freezer compartment, where containers can severely block airflow and trigger rapid frost buildup. It is also impractical for compact models that rely almost exclusively on molded door storage and offer less than 11 inches of usable interior shelf depth.
Sources & further reading
AI-assisted writing and concept images. Sources and automated checks support the process; they do not replace checking your own measurements.
How we create our guides · Suggest a correction