
To perfectly repair a hairline crack in a painted stucco wall, the key is meticulous preparation and texture matching. First, clean the crack with a wire brush to remove loose debris. Apply a thin bead of high-quality, paintable elastomeric caulk into the crack, tooling it smooth. While wet, use a damp sponge or stiff brush to dab or stipple the filler, mimicking the surrounding stucco texture. Let it cure completely, then prime the spot with a masonry primer before painting with the matching exterior color.
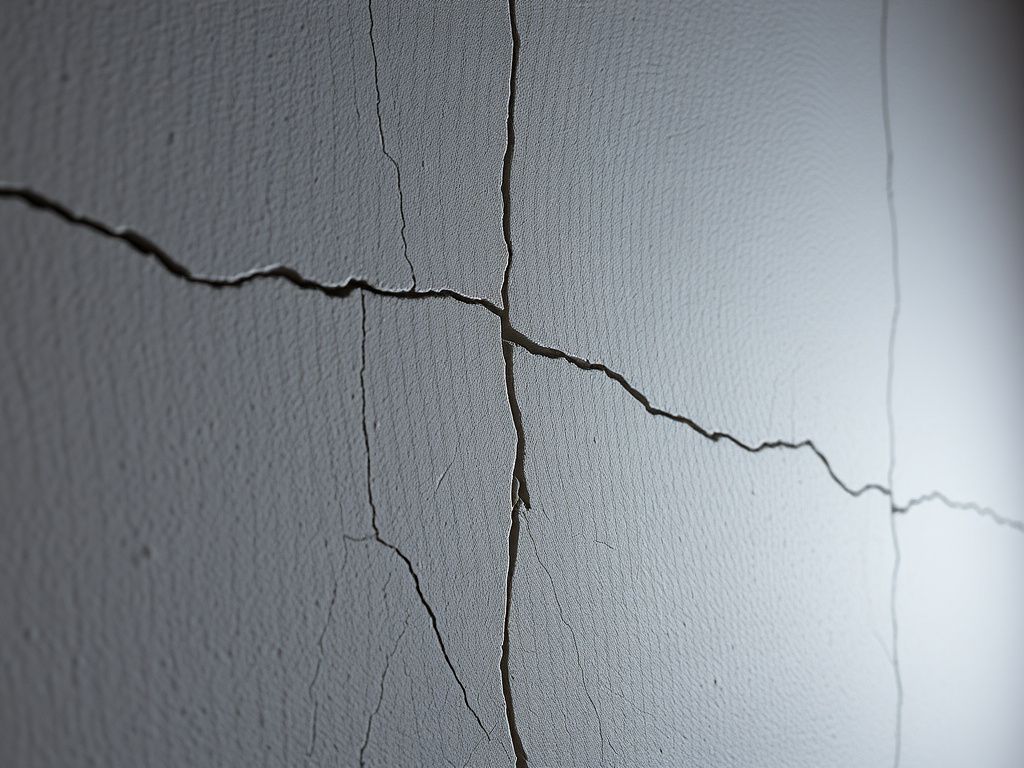
That persistent, spiderweb-thin line snaking across your stucco wall is more than just a cosmetic flaw. It’s a breach in your home’s armor. While hairline cracks are common, often resulting from the natural expansion and contraction of building materials, ignoring them is an invitation for moisture. Water intrusion is the nemesis of any home, leading to bigger cracks, interior damage, and even mold. As someone who has spent decades diagnosing and remedying issues on home exteriors, I can tell you that learning to patch these small imperfections correctly isn't just a DIY skill—it's preventative medicine for your house. The goal isn't just to fill a crack; it's to create a repair so seamless that even you forget where it was.
A Quick Diagnostic: Understanding Your Stucco Crack
Before you grab any tools, let's properly identify the problem. This guide is exclusively for hairline cracks, which are typically less than 1/8 inch wide. They are surface-level and usually follow random, meandering paths.
If you see a crack that is wider, runs in a straight line horizontally or vertically, or appears in a stair-step pattern through a block wall, you may be looking at a structural issue. These larger exterior wall cracks often signify foundation settling or other significant problems that require a professional assessment. For the minor, pesky hairline cracks, however, a DIY approach is perfectly suitable and highly effective. Also, be aware if you have traditional, cement-based stucco or a synthetic system like EIFS (Exterior Insulation and Finish System), as materials can sometimes differ, though the technique for hairline repairs remains largely the same.
The Essential Toolkit: Gathering Your Supplies for a Flawless Repair
Executing a professional-level repair requires the right tools and materials. Cutting corners here is the fastest way to a sloppy, visible patch that fails in a year. Here’s your shopping list:
Tools of the Trade:
- Wire Brush: For cleaning out the crack.
- Utility Knife: (Optional, but recommended) To gently chamfer or "V" the edges of the crack for better filler adhesion.
- Caulking Gun: For precise application of elastomeric caulk.
- Putty Knife: A flexible one is best for tooling the patching compound.
- Texture Tools: This is your artistic palette. A natural sea sponge, a stiff-bristled brush, or even a wadded-up plastic bag can be used to match the stucco texture.
- Small Paintbrush & Mini-Roller: For priming and painting.
- Safety Glasses: Non-negotiable. Debris and patching compound can easily get into your eyes.
Essential Materials:
- Elastomeric Caulking: Choose a high-quality, paintable exterior caulk. Its incredible flexibility is the key. It stretches and moves with the stucco, preventing the crack from re-forming. Do not use rigid acrylic or silicone caulk.
- Pre-mixed Stucco Patching Compound: For cracks that are on the wider end of the hairline spectrum, this provides more body to work with for texturing.
- Exterior Masonry Primer: Crucial for sealing the patch and ensuring the final paint coat matches perfectly.
- Your Original Exterior Paint: If you don't have leftovers, take a chip of the existing paint (at least 1-inch square) to a paint store for a precise color match.
Experts note that the single most common failure point in DIY stucco repair is using the wrong filler. The flexibility of elastomeric compounds cannot be overstated; they are designed specifically for masonry surfaces that experience thermal movement.
Step-by-Step: The Perfect Hairline Stucco Crack Repair
With your supplies gathered, it's time to perform the repair. Follow these steps methodically. Do not rush. Patience here pays dividends.
Step 1: Preparation is 90% of the Job
A pristine surface is the foundation of a durable patch.